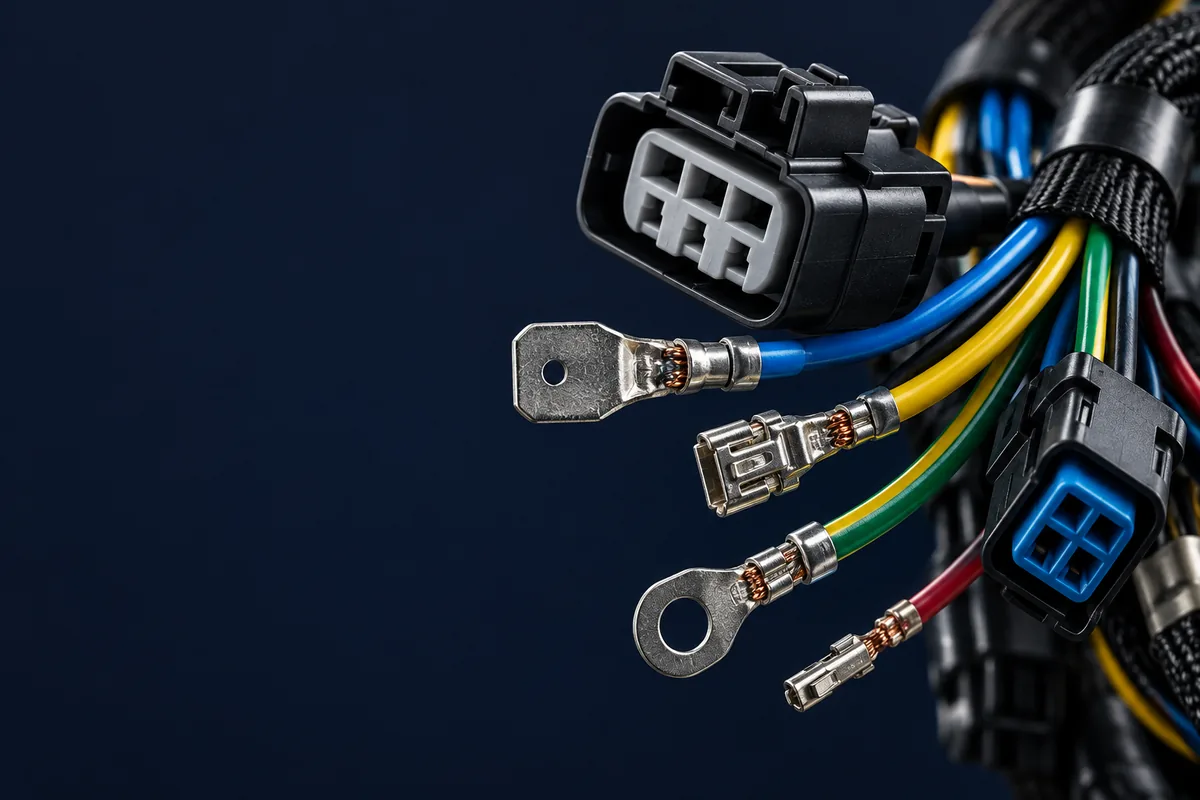
Direct answer: Make a reliable wire-harness crimp by matching the wire, terminal and approved tooling, then controlling strip length and conductor crimp height. Verify the finished termination with the applicable visual criteria and a pull test that isolates the conductor crimp. Select the numeric limits from the specific terminal application sheet and the contract-required IPC/WHMA-A-620 criteria.
Technical Guide
Crimp Height, Pull-Force Testing & IPC-620 Defect Standards
A weak crimp can look acceptable while failing mechanical or electrical requirements. This guide covers tool selection, terminal-specific crimp height limits, pull-force testing, gas-tight connection assessment, and common inspection defects.
Wire harness open-barrel crimp terminal cross-section showing copper conductor strands compressed in a gas-tight connection on a wire harness production line
A properly crimped open-barrel terminal has a conductor profile and bell-mouth geometry that match its application specification. Appearance alone does not establish long-term performance.
Crimping is widely used in wire harness manufacturing. An under-specified crimp can pass a visual check yet develop electrical or mechanical problems during service.
An undercrimped wire barrel can leave gaps at the conductor interface. Oxidation and mechanical movement can then increase contact resistance and contribute to intermittent faults.
IPC/WHMA-A-620 — the wire harness industry workmanship standard — provides workmanship requirements; use the applicable edition together with the terminal manufacturer's application specification. This guide covers everything an engineer or procurement team needs to specify, audit, and troubleshoot wire harness crimping.
1. What Is Wire Crimping — and Why Quality Matters
Crimping plastically deforms a metal terminal barrel around stripped conductor strands to create a mechanical and electrical connection. Unlike soldering, a proper crimp requires no heat and no flux — the cold-welding effect at the contact zone excludes air and oxide from the metal-to-metal interface.
A well-executed crimp compresses the conductor strands against the terminal barrel to form a stable mechanical and electrical interface. For industrial and medical applications, qualify compression and contact resistance against the specific terminal and program requirements.
Insufficient compression can leave a weak interface; excessive compression can damage the barrel or conductor strands. Use the terminal-specific crimp window rather than a universal compression percentage.
The conductor crimp must meet the applicable terminal specification and contract-required IPC/WHMA-A-620 criteria. A weak termination can pull out under vibration or installation tension.
Contact resistance should remain within the approved limits after the specified environmental tests. A loose crimp can develop resistance changes during service.
For exposed automotive and marine connections, specify a compatible sealing system and verify performance under the applicable environmental test plan.
2. Types of Crimp Terminals: Open-Barrel, Closed-Barrel, and Ferrules
Three terminal types cover the majority of wire harness applications. Each has a different barrel geometry that determines tooling compatibility, inspection method, and environmental protection level.
Open-barrel terminals are the production standard for automotive and industrial harnesses. The U-shaped wire barrel allows a trained inspector to visually confirm conductor fill and seating before terminal insertion into a connector housing. This visual access makes open-barrel crimps a useful format for visual inspection before housing insertion.
Table
| Terminal Type | Barrel Geometry | Inspection Method | Typical Application | Tool Compatibility |
|---|---|---|---|---|
| Open-barrel (F-crimp) | U-shaped, open top | Visual + pull-force | Automotive, industrial, consumer electronics | Ratchet crimper, applicator, press |
| Closed-barrel (butt splice) | Cylindrical, fully enclosed | Pull-force + resistance measurement | Marine, splice connections, sealed connectors | Closed-barrel crimper (shaped die required) |
| Ferrule (end-sleeve) | Cylindrical, open one end | Visual + pull-force | PLC wiring, panel connections, stranded wire to screw terminals | Ferrule crimper (hexagonal die) |
| Insulation-displacement (IDC) | Forked slot, no stripping needed | Pull-force | Flat cable, ribbon harness, telecom | IDC tool or press |
3. Crimp Tools: From Manual Ratchet to Fully Automated
Crimp tool selection determines production throughput, crimp consistency, and quality traceability. A manual ratchet crimper in skilled hands produces acceptable crimps — but process control depends on approved tooling, setup, maintenance, and operator technique. Automated applicators can reduce operator variation at the cost of higher tooling investment.
Compare manual and semi-automated crimping using the actual production mix, labor, tooling, and inspection needs. Applicators can improve repeatability, while any force-monitoring system requires validation of its detection limits.
Table
| Tool Type | Volume Suitability | Crimp Height Control | Cost Basis | Quality Traceability |
|---|---|---|---|---|
| Manual ratchet pliers | Low-volume work | Approved die and setup dependent | Current supplier quote required | Inspection and pull tests per plan |
| Bench-top applicator (manual press) | Repeat production | Per terminal and tooling specification | Current supplier quote required | Pull-force + first-article crimp height |
| Pneumatic / hydraulic press applicator | Repeat production | Per terminal and tooling specification | Current supplier quote required | Force monitoring, process data |
| Automated cut-strip-crimp (Komax, Schleuniger) | Repeat production suited to automation | Configured force and vision monitoring | Current supplier quote required | Configured process records and defect detection |
Note: Define tooling verification, maintenance, calibration, and sampling in the control plan. Revalidate tooling after damage, repair, or wear as required by the manufacturer and governing workmanship criteria.
4. Crimp Height: A Key Specification to Control
Crimp height (H) is the distance across the compressed wire barrel measured perpendicular to the crimping direction. It is a key dimensional specification that should be included in the approved process documentation.
Use the terminal manufacturer's crimp height window for the exact terminal and wire combination. A satisfactory pull result does not override a specified dimensional limit; assess both against the approved requirements.
Measure crimp height with the specified instrument at setup and at the intervals in the control plan. Confirm sampling and record requirements against the contract-required workmanship standard.
Table
| AWG | Nominal AWG area (mm²); Thermtrol reference | Conductor Height Minimum | Conductor Height Maximum | Tolerance Window |
|---|---|---|---|---|
| 30 AWG | 0.051 mm² (nominal) | Per terminal specification | Per approved control plan | Per approved control plan |
| 28 AWG | 0.080 mm² (nominal) | Per terminal specification | Per approved control plan | Per approved control plan |
| 26 AWG | 0.128 mm² (nominal) | Per terminal specification | Per approved control plan | Per approved control plan |
| 24 AWG | 0.205 mm² (nominal) | Per terminal specification | Per approved control plan | Per approved control plan |
| 22 AWG | 0.324 mm² (nominal) | Per terminal specification | Per approved control plan | Per approved control plan |
| 20 AWG | 0.519 mm² (nominal) | Per terminal specification | Per approved control plan | Per approved control plan |
| 18 AWG | 0.823 mm² (nominal) | Per terminal specification | Per approved control plan | Per approved control plan |
| 16 AWG | 1.308 mm² (nominal) | Per terminal specification | Per approved control plan | Per approved control plan |
| 14 AWG | 2.082 mm² (nominal) | Per terminal specification | Per approved control plan | Per approved control plan |
| 12 AWG | 3.308 mm² (nominal) | Per terminal specification | Per approved control plan | Per approved control plan |
Note: AWG alone does not define a crimp height. The nominal areas above are reference values; confirm the actual stranded construction and height limits for the specific wire, terminal, and tool combination; do not transfer settings between part numbers without qualification.
5. Pull-Force Testing: Selecting Limits by Wire and Terminal
Pull-force testing measures the axial force required to separate the conductor and terminal. Select acceptance limits from the terminal application sheet and the contract-required edition of IPC/WHMA-A-620; this guide does not reproduce a universal acceptance table.
Grip and pull the specimen using the application sheet's method, without unintended support from the insulation crimp. Record the peak load and failure location; conductor breakage and pullout must be interpreted using the specified acceptance criteria.
Define setup testing and production sampling in the approved control plan. Use destructive test specimens as specified rather than assuming a fixed first-unit or class-based sampling rule.
Table
| AWG | Nominal AWG area (mm²); Thermtrol reference | Applicable Minimum Pull Force | Additional Program Requirement |
|---|---|---|---|
| 30 AWG | 0.051 mm² (nominal) | Per terminal specification | Per approved control plan |
| 28 AWG | 0.080 mm² (nominal) | Per terminal specification | Per approved control plan |
| 26 AWG | 0.128 mm² (nominal) | Per terminal specification | Per approved control plan |
| 24 AWG | 0.205 mm² (nominal) | Per terminal specification | Per approved control plan |
| 22 AWG | 0.324 mm² (nominal) | Per terminal specification | Per approved control plan |
| 20 AWG | 0.519 mm² (nominal) | Per terminal specification | Per approved control plan |
| 18 AWG | 0.823 mm² (nominal) | Per terminal specification | Per approved control plan |
| 16 AWG | 1.308 mm² (nominal) | Per terminal specification | Per approved control plan |
| 14 AWG | 2.082 mm² (nominal) | Per terminal specification | Per approved control plan |
| 12 AWG | 3.308 mm² (nominal) | Per terminal specification | Per approved control plan |
| 10 AWG | 5.261 mm² (nominal) | Per terminal specification | Per approved control plan |
| 8 AWG | 8.367 mm² (nominal) | Per terminal specification | Per approved control plan |
A Traceable Crimp Setup Example: Molex 63819-0900
1. Tie numeric limits to a named tool and terminal. The following values come from ATS-638190900, Revision H, page 3 for listed Mini-Fit Jr. 5556 series terminals. These are model-specific reference values, subject to the exact terminal order number and current application sheet; they are not a general AWG acceptance table. Source: Molex 63819-0900 application specification.
| Wire gauge | Conductor crimp height, reference | Minimum pull force, N column |
|---|---|---|
| 18 AWG | 1.00–1.10 mm | 88.0 N |
| 20 AWG | 0.83–0.93 mm | 58.7 N |
| 24 AWG | 0.78–0.88 mm | 29.3 N |
2. Isolate the conductor in pull testing. The tool qualification notes require pull-force measurement without influence from the insulation crimp. Otherwise, insulation support can contribute force and obscure a weak conductor termination. Prepare the specimen according to the application sheet, and record the failure location as well as peak force. Source: Molex tool qualification notes, page 3.
3. Keep the measurement window attached to the setup record. In the 20 AWG example, the listed endpoints span 0.10 mm. Record individual readings rather than only an average: an average inside the window can hide a specimen outside it. Retain tool ID, terminal order number, wire lot and measurement instrument ID with those readings so a later setup can be compared with the approved combination.
6. Gas-Tight Crimps: What They Are and When You Need Them
A gas-tight contact interface limits air access at the compressed contact points. Its stability depends on the terminal, conductor, tooling, and environmental qualification.
Where contact-resistance stability is critical, specify the required connection performance and qualification evidence for the application.
A pull test evaluates mechanical retention and cannot alone establish gas-tightness. Review microsections together with electrical and environmental qualification data using the terminal-specific methods and any automotive OEM acceptance criteria.
7. Wire Preparation: Strip Length, Strand Count, and Conductor Seating
Wire preparation errors can cause crimp failures. Three parameters determine wire preparation quality: strip length, strand count within the barrel, and conductor seating depth.
Specify strip length and conductor brush dimensions from the terminal application sheet. Excess exposed conductor can create short-circuit risks, while insufficient stripping or seating can compromise the crimp.
Do not solder-tin stranded conductors before crimping unless the approved terminal application explicitly permits it. Solder changes the way the bundle deforms; distinguish solder-tinned ends from factory-plated conductor strands.
Use the strip length and conductor brush limits specified for the terminal. Qualify the stripping setup and inspect for damaged strands using the governing acceptance criteria.
Seat the conductor bundle as required by the terminal application sheet. Evaluate escaped strands and birdcaging using the applicable workmanship criteria.
Confirm conductor finish and preparation against the terminal application specification. Solder-tinned ends require explicit process approval; factory-plated strands are a separate construction.
8. Seven Common Crimp Defects and How to Identify Them
Wire harness inspection teams can use the following seven defect examples alongside the applicable IPC/WHMA-A-620 criteria. Each has a distinct visual signature, a root cause in tooling or process, and a defined accept/reject criterion that varies by quality class.
Table
| Defect | Visual Indicator | Root Cause | IPC-620 Verdict |
|---|---|---|---|
| Cold crimp | Flat, unformed appearance; wire barrel shows no cross-section deformation | Tooling not fully closed; ratchet released before full closing; die misalignment | Evaluate against the governing standard and terminal specification |
| Overstruck (overcrimped) | Crushed or cracked barrel metal; extruded material; visible conductor damage | Incorrect die size (too small); wrong terminal for wire gauge; worn die causing false crimp height | Evaluate against the governing standard and terminal specification |
| Undercrimped | Loose barrel; individual strands visible as separate wires beneath barrel walls | Incorrect die size (too large); worn die; wrong terminal for wire gauge | Evaluate against the governing standard and terminal specification |
| Strand damage (nick or cut) | Bright cut marks or nicks on conductor strands within or near wire barrel | Incorrect stripping blade adjustment; sharp die edges; wrong tool for wire type | Evaluate against the governing standard and terminal specification |
| Insulation barrel damage | Insulation barrel cuts through wire jacket; bare conductor exposed at insulation crimp zone | Insulation barrel die too tight; wrong tool for wire OD; misaligned insulation barrel | Evaluate against the governing standard and terminal specification |
| Conductor gap (incomplete seating) | Strands do not reach barrel bottom; visible gap between strand end and terminal contact bottom | Strip length too short; strands not pushed to bottom before crimp; birdcaging on insertion | Evaluate against the governing standard and terminal specification |
| Birdcaging | Conductor strands fan outward, forming a cone shape before entering wire barrel | Excessive strip length; wire end not compressed before insertion; too-small wire for terminal | Evaluate against the governing standard and terminal specification |
9. IPC/WHMA-A-620 Crimp Acceptance Criteria for Class 1, 2, and 3
IPC/WHMA-A-620 distinguishes Classes 1, 2, and 3 by end-product performance requirements. The customer must specify the applicable class; an industrial or medical industry label alone does not assign it.
Acceptance criteria can vary by product class and termination type. Check the contract-required edition and approved control plan for inspection and qualification requirements.
Bell-mouth geometry is assessed against the terminal application sheet. The expected flare can protect conductors at the barrel edge, but it does not by itself prove correct fill or gas-tightness.
Table
| Condition | Class 1 | Class 2 | Class 3 |
|---|---|---|---|
| Bell-mouth (slight flare at barrel ends) | Check governing acceptance criteria | Check governing acceptance criteria | Check governing acceptance criteria |
| Wire barrel flash / wings (not penetrating insulation) | Check governing acceptance criteria | Check governing acceptance criteria | Check governing acceptance criteria |
| Wire barrel wings penetrating insulation | Check governing acceptance criteria | Check governing acceptance criteria | Check governing acceptance criteria |
| Single strand outside wire barrel (conductor side) | Check governing acceptance criteria | Check governing acceptance criteria | Check governing acceptance criteria |
| Insulation material visible in wire barrel | Check governing acceptance criteria | Check governing acceptance criteria | Check governing acceptance criteria |
| insulation gap at insulation barrel | Check governing acceptance criteria | Check governing acceptance criteria | Check governing acceptance criteria |
| gap at insulation barrel (bare wire exposed) | Check governing acceptance criteria | Check governing acceptance criteria | Check governing acceptance criteria |
| Crimp height outside H_min or H_max | Check governing acceptance criteria | Check governing acceptance criteria | Check governing acceptance criteria |
| Pull-force below specified minimum | Check governing acceptance criteria | Check governing acceptance criteria | Check governing acceptance criteria |
Note: For complete acceptance criteria including dimensional limits and photographic reference standards, refer to the current edition of IPC/WHMA-A-620 published by IPC (Association Connecting Electronics Industries). Verify you are using the current revision — the standard is updated periodically to reflect new terminal technologies and quality class requirements.
10. Frequently Asked Questions
Frequently Asked Questions
What is the minimum pull force for a 20 AWG crimp per IPC/WHMA-A-620?
Use the contract-required IPC/WHMA-A-620 edition and the exact terminal application specification to select the minimum. Do not treat an AWG-only value or an assumed percentage margin as a universal requirement. The sourced Molex example above applies only to its listed terminal and tool combination.
What is crimp height and why does it matter more than pull force alone?
Crimp height is the distance across the compressed wire barrel measured perpendicular to the crimping direction, specified as H_min to H_max for each terminal and wire gauge combination. A crimp can pass pull-force testing while being outside crimp height spec — the wire barrel contacts may hold under static tension but fail cyclic fatigue or thermal expansion over service life. Both measurements are required for complete qualification. Apply the specified dimensional limits independently of the pull-force result.
Can I crimp pre-tinned (solder-coated) wire in a wire harness?
Do not solder-tin conductor ends before crimping unless the terminal manufacturer explicitly permits that process. Confirm compatibility with the conductor finish and approved tooling; factory-plated strands are distinct from solder-tinned ends.
What is the difference between a bell-mouth crimp and a defective crimp?
A bell-mouth is a flare at the barrel edge whose geometry must match the terminal application sheet. It does not alone prove correct conductor seating. Check it alongside crimp height, strand condition, and the governing workmanship criteria.
My manufacturer claims their crimps are gas-tight. How do I verify this?
Request microsections and contact-resistance results from the qualification records. Confirm that the specimens, environmental conditions, and acceptance limits match the specific terminal and application. A pull test alone does not establish gas-tightness.
I need 500 wire harnesses with crimped terminals. What crimp quality documentation should I require from the manufacturer?
For a 500-unit production run, require: (1) First article inspection report with crimp height measurements for every terminal part number used, (2) Pull-force test results from first article showing individual readings vs the applicable terminal and workmanship limits, (3) Crimp tooling calibration records showing qualification date and calibration interval, (4) Crimp cross-section photographs if gas-tight crimps are required by your application, and (5) Traceability records linking terminal lot numbers to specific harness unit serial numbers. For IATF 16949 or ISO 13485 programs, also request the completed process control plan for the crimping operation.
Frequently Asked Questions
What is the minimum pull force for a 20 AWG crimp per IPC/WHMA-A-620?
Use the contract-required IPC/WHMA-A-620 edition and the exact terminal application specification to select the minimum. Do not treat an AWG-only value or an assumed percentage margin as a universal requirement. The sourced Molex example above applies only to its listed terminal and tool combination.
What is crimp height and how do I measure it?
Crimp height is the distance across the compressed wire barrel measured perpendicular to the crimping direction, defined as H_min to H_max for each terminal and wire gauge combination. Measured with a blade micrometer (crimp height gauge) after tooling changes and at first article. Apply the approved H_min and H_max limits for the selected termination.
What is a gas-tight crimp and how is it verified?
A gas-tight contact interface restricts air access at the compressed metal contact points. Review microsections and electrical/environmental qualification data against the specific application requirements; pull testing alone does not verify it.
Cta
Title: Need Crimped Wire Harnesses to IPC/WHMA-A-620 Standards?
We manufacture wire harnesses with fully documented crimp processes — crimp height records, pull-force test data, and first article inspection reports with deliverables agreed for the program. Tell us your AWG range, terminal requirements, and quality class, and we will provide a complete manufacturing proposal.
Primarybutton: Request a Free Quote
Secondarybutton: View Our Capabilities