Real Project Snapshot — Custom Cable Assembly Process Guide
Anonymized example from our case bank, shared so buyers can see how this scope is actually executed in production.
Industry: earthmoving-equipment | Region: Australia | Year: 2023 → 2024
Scenario: An Australian heavy machinery manufacturer requested quotes for multiple custom wire harness models but provided incomplete technical drawings at the initial inquiry stage.
Challenge: Missing critical specifications, including relay models, Deutsch connector models, and Hammond enclosure details, prevented accurate quoting and risked production errors for the 200-piece batch.
Solution: We implemented an engineering-to-engineering clarification process, compiling a detailed technical checklist to guide the client's internal engineering team to provide the missing specs, ensuring all requirements were locked down before sampling.
Result: Achieved full specification lock-down, enabling accurate quoting for 3 sample units and the 200-piece production run, preventing costly rework and material delays.
Concrete numbers: 3 sample units, 200-piece batch size, Deutsch connectors specified, Hammond enclosures specified
"How long will it take to get my custom cable assembly?" It's the first question every customer asks—and the answer depends entirely on how well they understand and engage with the manufacturing process. I've seen projects go from concept to delivery in 3 weeks, and I've seen similar projects take 6 months because of avoidable delays.
After producing thousands of custom cable assemblies at our facility, I've identified the 8 critical steps that determine project success. Understanding this process will help you work effectively with your manufacturer and get your product to market faster.
1 Requirements Gathering: The Foundation of Everything
This is where 80% of project problems originate. Incomplete or unclear requirements lead to misquotes, design revisions, and delays. The more detail you provide upfront, the smoother everything else goes.
Essential Information to Provide
| Category | Required Information | Why It Matters |
|---|---|---|
| Electrical | Voltage, current, signal types, wire gauge | Determines wire/insulation selection |
| Mechanical | Length, routing constraints, bend radius | Affects design and material choices |
| Environmental | Temperature range, chemicals, IP rating | Determines jacketing and sealing |
| Connectors | Part numbers, manufacturer, pinout | Drives tooling and material ordering |
| Volume | Annual quantity, lot sizes, ramp schedule | Affects pricing and process design |
| Compliance | UL, RoHS, industry standards | Material sourcing and documentation |
Documentation Checklist
Ideal Documentation
- Detailed engineering drawing
- Bill of Materials (BOM)
- Connector datasheets
- Wire/cable specifications
- Test requirements
Minimum Viable Start
- Basic sketch with dimensions
- Connector types/preferences
- Number of conductors
- Operating environment
- Sample or existing unit
Hommer's Take
"The number one thing that delays projects? When customers say 'just like this sample' and send a physical unit without any documentation. We have to reverse- engineer everything—measure wire gauges, identify connectors, trace circuits. This takes days and introduces errors. If you have documentation, share it. If you don't, expect a longer quotation process."
2 Quotation & Lead Time Estimation
Once we have your requirements, we develop a detailed quotation. This involves reviewing specifications, sourcing materials, estimating labor, and calculating tooling requirements.
What Goes Into a Quote
| Cost Component | Description | Typical % |
|---|---|---|
| Materials | Wire, connectors, terminals, sleeving, labels | 40-60% |
| Labor | Cutting, stripping, crimping, assembly, testing | 25-40% |
| Tooling/Setup | Crimp applicators, test fixtures, jigs | One-time NRE |
| Quality/Testing | Inspection, testing, documentation | 5-15% |
| Overhead/Margin | Facility, equipment, management, profit | 10-20% |
How Volume Affects Pricing
Higher volumes mean lower per-unit costs due to:
- Material discounts: Larger wire/connector orders get better pricing
- Setup amortization: One-time costs spread across more units
- Labor efficiency: Workers get faster with practice
- Automation justification: High volumes justify specialized equipment
⚠️ Quote Validity
Most quotes are valid for 30-60 days. Material costs (especially copper) fluctuate, and connector lead times can change dramatically. If you delay beyond the quote validity, request an updated quote before placing your order.
3 Design & Engineering Review
Once the order is confirmed, our engineering team creates or reviews the production documentation. This is where we translate your requirements into manufacturable specifications.
Engineering Deliverables
- • Wire routing diagram
- • Connector pinout
- • Length specifications
- • Labeling requirements
- • Material callouts
Bill of Materials (BOM)
- • Part numbers for all components
- • Quantities per assembly
- • Approved suppliers
- • Alternate parts (if any)
Work Instructions
- • Step-by-step assembly sequence
- • Process parameters
- • Quality checkpoints
- • Visual inspection criteria
Test Specifications
- • Continuity test parameters
- • Hipot voltage/duration
- • Pass/fail criteria
- • Test equipment requirements
During this phase, we may come back with design questions or suggestions. This is normal—our engineers often identify potential issues or cost savings that weren't obvious in the requirements phase.
4 Prototype Development
Before committing to full production, we build prototype units to validate the design. This step catches problems before they become expensive.
What Prototyping Validates
Fit & Form
- • Connector compatibility
- • Length accuracy
- • Routing feasibility
- • Physical interference
Function
- • Electrical continuity
- • Signal integrity
- • Current capacity
- • System integration
Hommer's Take
"Some customers want to skip prototyping to save time. I strongly advise against this for any new design. The cost of a few prototypes is nothing compared to the cost of producing 1,000 units and discovering they don't fit. I've seen customers lose tens of thousands of dollars because they skipped this step. The only time to skip prototyping is for a simple change to an existing design where you're highly confident."
Prototype Approval Process
We ship samples to you
Usually 2-5 units depending on your testing needs
You test in your application
Fit check, electrical test, environmental testing if needed
Feedback and revision (if needed)
We iterate until the design is approved
Written approval
Your sign-off freezes the design for production
5 Production Preparation
With an approved prototype, we prepare for production. This involves finalizing tooling, ordering materials, and setting up the production line.
Production Prep Activities
| Activity | Typical Duration | Notes |
|---|---|---|
| Material Ordering | 1-4 weeks | Connector lead times vary widely |
| Tooling Fabrication | 1-2 weeks | Crimp applicators, test fixtures |
| Assembly Board Setup | 1-3 days | Jigs for consistent routing |
| Test Program Development | 1-3 days | Automated tester programming |
| Operator Training | 1-2 days | Process familiarization |
| First Article Production | 1 day | Final verification before run |
⚠️ Lead Time Reality
The biggest schedule risk is usually material lead times. Popular connectors from major manufacturers (TE, Molex, Amphenol) can have 12-20 week lead times during supply chain disruptions. We can often suggest alternatives, but if you require specific part numbers, plan accordingly.
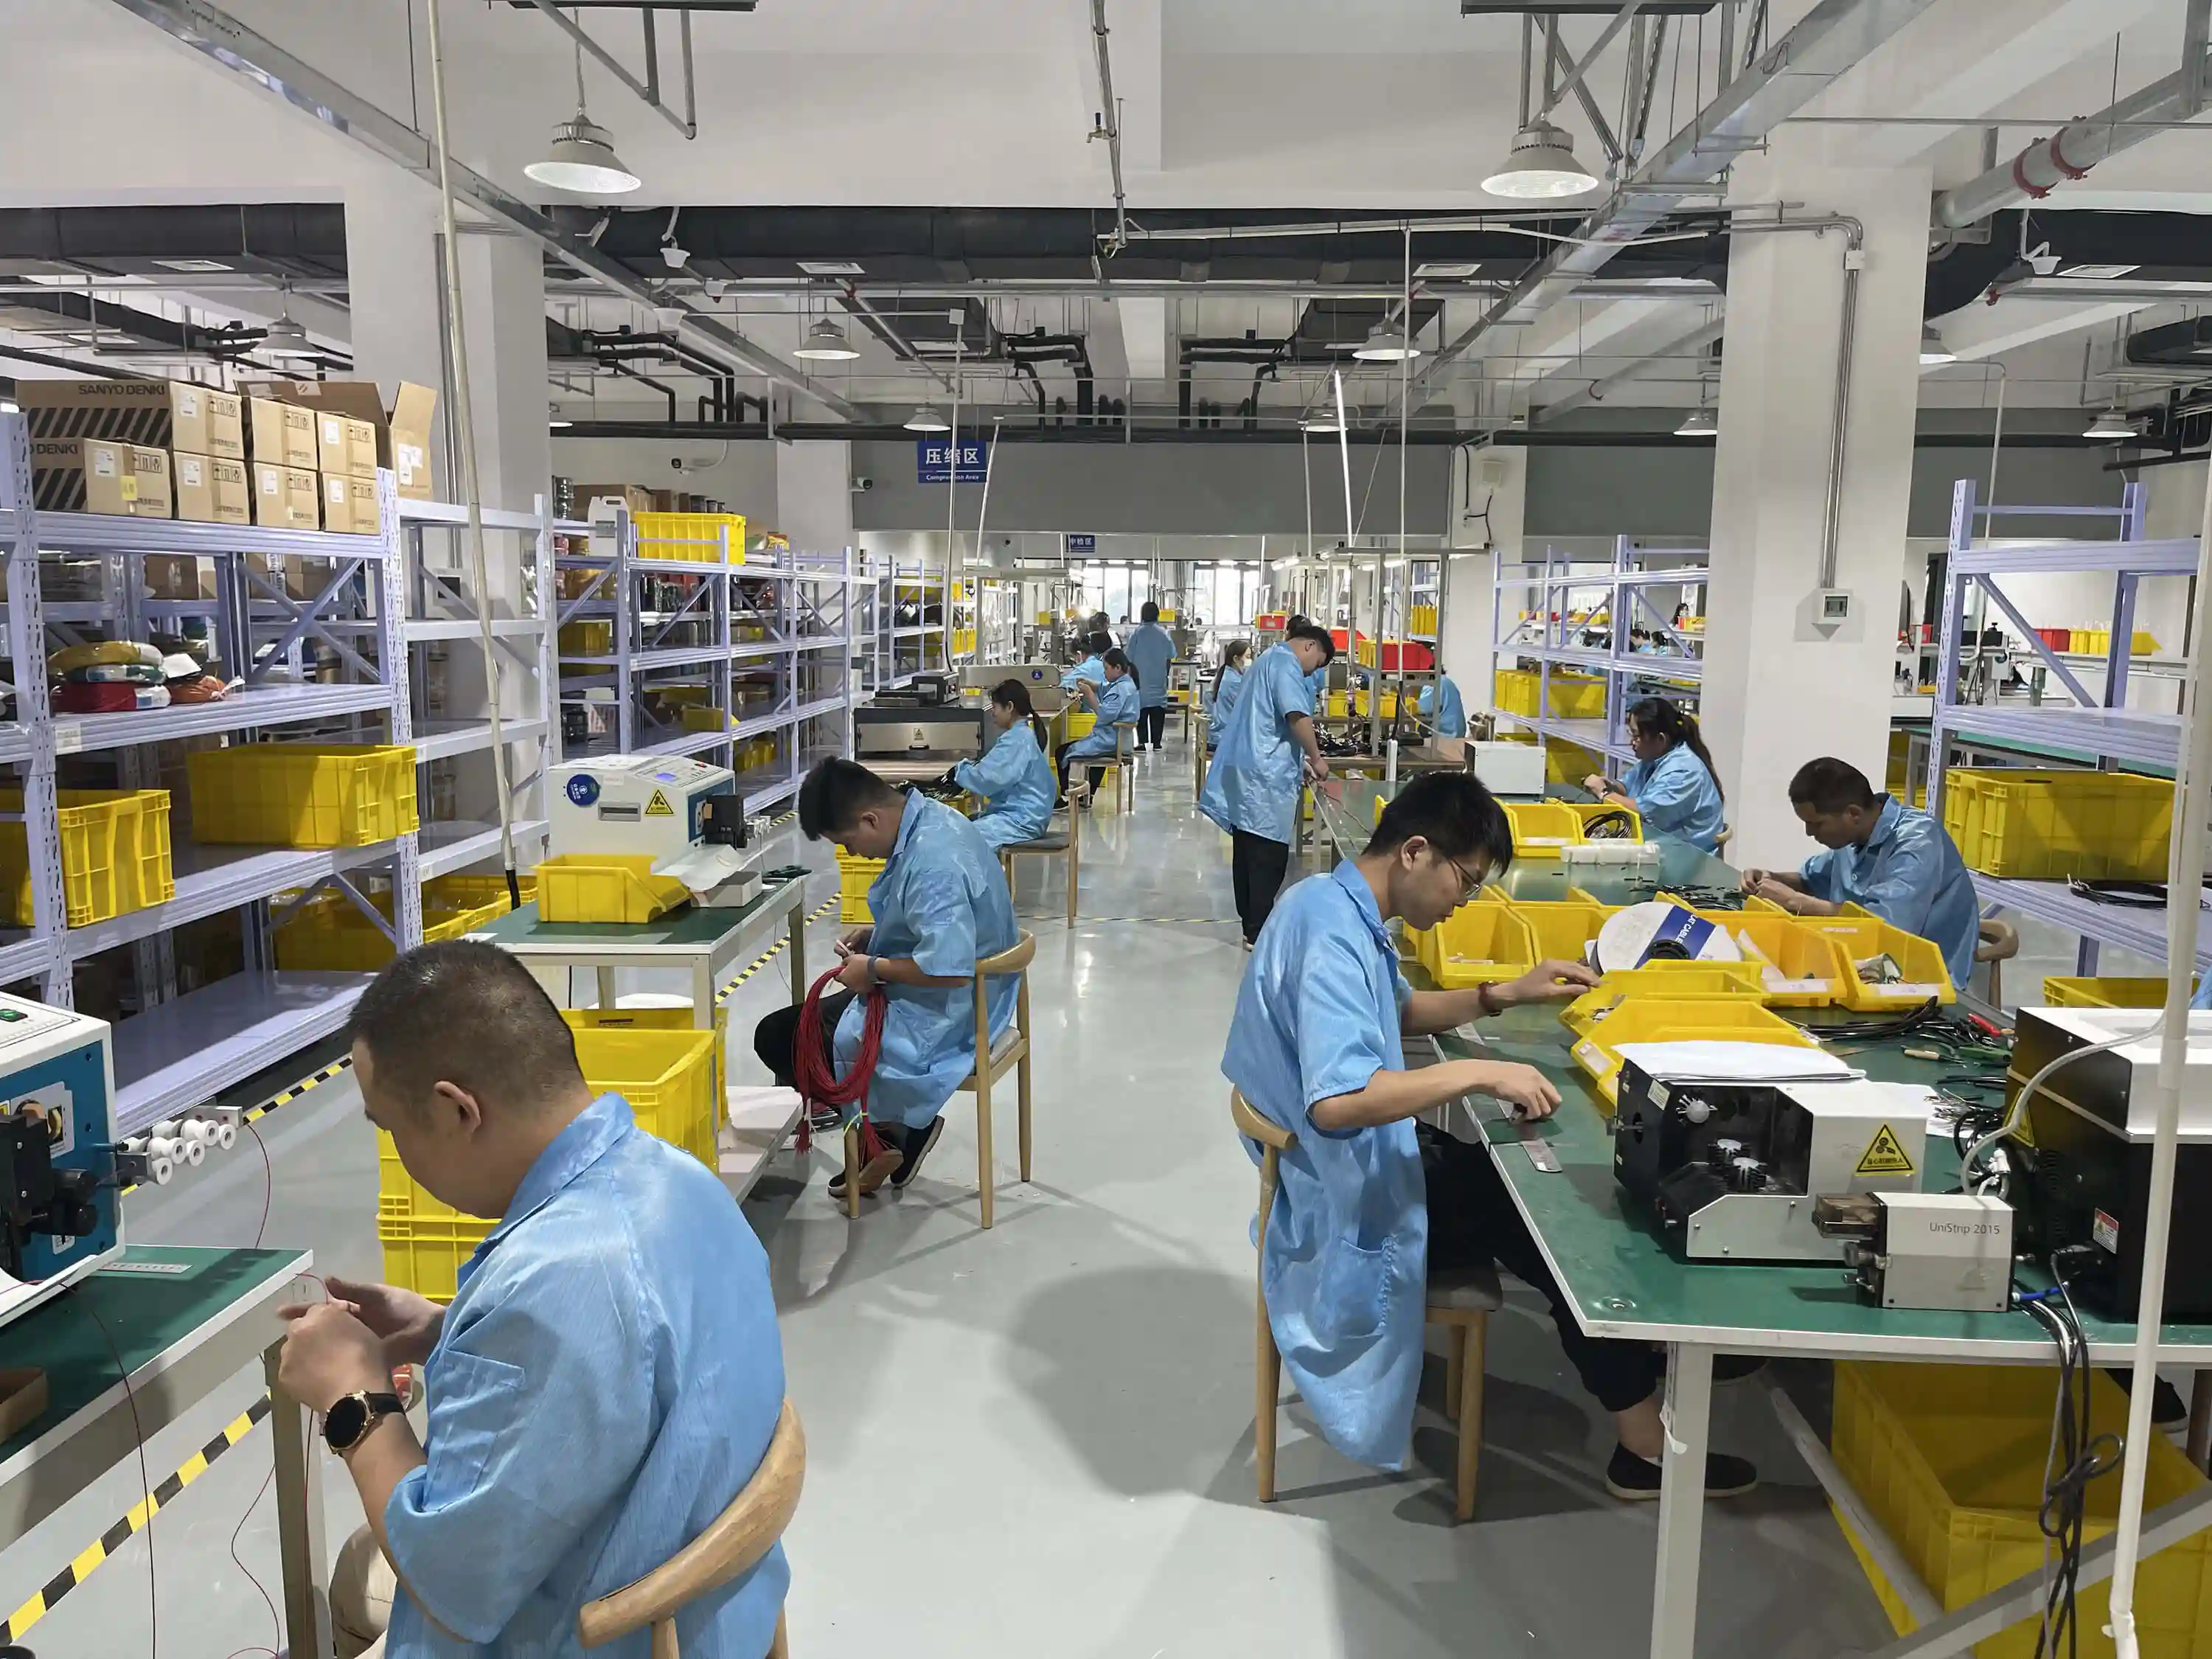
6 Manufacturing: Where It All Comes Together
Production begins once materials arrive and preparation is complete. Here's what happens on the manufacturing floor:
Manufacturing Operations
Wire Processing
Cutting to length, stripping insulation, twisting (if required). Automated cut-and-strip machines handle high volumes; manual processing for complex cables.
Terminal Crimping
Attaching terminals using calibrated crimp presses. Each terminal type requires specific tooling and settings. Learn about crimp quality verification .
Connector Assembly
Inserting terminals into connector housings. Position, orientation, and retention must be verified for each wire.
Harness Assembly
Routing wires on assembly board, adding sleeving/tape/conduit, installing clips/grommets, branch bundling.
Labeling & Marking
Applying identification labels, wire markers, warning labels, and compliance markings as specified.
7 Testing & Quality Assurance
Every harness undergoes testing before shipment. The extent of testing depends on your requirements and industry standards. Read our complete guide on wire harness testing methods .
Standard Testing Protocol
| Test | What It Checks | Frequency |
|---|---|---|
| Visual Inspection | Workmanship, damage, labeling | 100% |
| Continuity | All connections complete and correct | 100% |
| Hipot (if required) | Insulation integrity | 100% or sample |
| Dimensional | Length, routing, branch points | First article + sample |
| Pull Test | Crimp/termination strength | First article + sample |
Hommer's Take
"I've been in this industry long enough to know that 100% testing isn't optional— it's the only way to guarantee quality. Some manufacturers skip testing to save time and cost. We don't. Every single harness that leaves our facility has been electrically tested. If we find a defect, we fix it before it becomes your problem. That's what real certification means in practice."
8 Packaging & Delivery
The final step—getting your harnesses to you safely and on time.
Packaging Options
Standard
Individually bagged, boxed in quantity
Best for: General industrial
Custom
Specific packaging to your requirements
Best for: Kitting, line-side delivery
Protective
ESD bags, foam inserts, custom trays
Best for: Sensitive electronics
Shipping Considerations
If sourcing from international manufacturers , shipping method significantly impacts total lead time:
| Method | Transit Time | Cost | Best For |
|---|---|---|---|
| Air Express | 3-5 days | $$$ | Prototypes, urgent orders |
| Air Freight | 5-10 days | $$ | Medium urgency |
| Sea Freight | 25-40 days | $ | Large orders, planned inventory |
Typical Project Timeline
Here's what a realistic timeline looks like for a typical custom cable assembly project:
| Phase | Simple Design | Complex Design |
|---|---|---|
| Quote | 1-2 days | 3-5 days |
| Design Review | 2-3 days | 1-2 weeks |
| Prototype | 1-2 weeks | 2-4 weeks |
| Production Prep | 1-2 weeks | 2-4 weeks |
| Production | 1-2 weeks | 2-4 weeks |
| Shipping (Air) | 3-5 days | 3-5 days |
| Total | 4-8 weeks | 8-16 weeks |
Common Mistakes to Avoid
After seeing hundreds of projects, these are the most common mistakes that cause delays and extra costs:
1. Incomplete Requirements
Providing partial information leads to multiple quote revisions and design iterations. Take time upfront to document everything.
2. Skipping Prototyping
Going straight to production and discovering fit issues. The cost of prototypes is negligible compared to scrapping a production run.
3. Unrealistic Lead Time Expectations
Expecting 2-week delivery for a complex new design. Plan for realistic timelines and communicate urgency early if needed.
4. Changing Requirements Mid-Project
Design changes after approval reset the process. Finalize requirements before prototype approval whenever possible.
5. Not Communicating Volume Forecasts
Material planning depends on volume visibility. If you expect growth, share forecasts so we can secure capacity and materials.
Hommer's Take
"The customers who get the best results are the ones who treat the process as a partnership. They provide complete information, respond quickly to questions, test prototypes thoroughly, and communicate changes early. We can overcome almost any challenge when there's good communication. But even the best manufacturer can't read minds. Help us help you—that's the secret to a successful cable assembly project."
Conclusion: Your Roadmap to Success
Custom cable assembly manufacturing isn't complicated, but it does require systematic execution. By understanding and engaging with each step of the process, you can minimize delays, reduce costs, and get exactly the product you need.
If you're ready to start your custom cable assembly project, use our supplier evaluation questions to find the right manufacturing partner . And when you're ready to get started, we're here to help.
Frequently Asked Questions
What are the main steps in the custom cable assembly process?
The typical flow is requirements gathering, design and DFM review, BOM creation and component sourcing, prototyping, testing and validation, production build, quality inspection, and packaging and delivery. Each stage has a sign-off so problems are caught before they scale into a full run.
How long does the full custom cable assembly process take?
A prototype usually takes 1–2 weeks once materials are available, and production runs 2–4 weeks after prototype approval. Specialty connectors with long procurement lead times are the most common cause of a longer schedule.
What information do I need to provide to start?
At minimum a drawing or schematic, a bill of materials, a connector and pinout list, the operating environment, and the required quantity. A complete package up front removes the clarification cycles that otherwise delay quoting and sampling.
Do you provide design or DFM support?
Yes. A design-for-manufacturability review checks connector compatibility, wire routing, strain relief, and testability before tooling, which prevents costly rework once production starts.
What testing is performed during the process?
Standard checks include continuity, hipot/dielectric withstand, insulation resistance, crimp pull-force, and where applicable IP or leak testing. The exact suite is set by the application and the customer's acceptance criteria.
Can the same process handle both low and high volume?
Yes. Low-volume builds use manual assembly and reusable fixtures, while high-volume runs add automation and dedicated tooling. The design documentation created early carries through both, so scaling up does not restart the process.